Introduction to Coffee Cupping
By, Charles Weber 2023
Introduction
Coffee cupping or simply taste testing coffee, is something that is done every day or almost every day by the professional coffee roaster. Cupping is done for several reasons in the coffee industry, defects and quality of flavor. The coffee farmer cups the coffees they grow to verify the quality they promised the importer. The importer cups coffees to verify the promised quality from the farmer. The roaster cups the coffee to verify the quality promised from the coffee importer. As well both the farmer and the importer sets the price of the coffee they have for sale based on their cupping results. Though often the importer has an agreement with the farmer to buy the coffee before it is ever harvested, based on cupping results once delivered. Coffee cupping is a very important part of the coffee producing industry worldwide.
Sampling is a term use to describe what’s done when you cup a batch of coffee you have purchased, taking a small sample and checking it for its flavor characteristics or flavor profile. A bean thief (See Figure 11.) is used to take a small sample of green coffee beans from the burlap bag that green coffee is shipped in without opening the bag. The bean thief tends to be used predominantly by the farmer, producer and importer to test coffees as they move through production and shipping where they aren’t going to open the bag of coffee once its sewn closed. Coffee roasters tend to get samples from importers in small plastic bags generally containing 8 to 16 ounces of green coffee beans. This green coffee sample is then roasted in a sample roaster for cupping. Green or unroasted coffee after having been grow and processed at origin countries is predominantly put into 60 or 70 kilo burlap bags depending on the country its grown in. These bags full of green coffee beans are then put into a shipping container 250 at a time to be shipped to the importer that has purchased it.
Today’s coffee sample is an Organically grown Colombian coffee from the Bucaramanga region called Mesa de Los Santos, a Smithsonian Bird Friendly Certified coffee from Royal Coffee in Emeryville California.
Equipment:
- Burr grinder
- Gram scale or coffee scoop
- Minute Timer
- Sample trays or small bowls one for each coffee sample
- Hot water kettle (195-205°F)
- Cupping spoons silver or stainless one for each person
- Clean well lit area with enough room for everyone cupping around a table or counter
- Cupping glasses of equal volume two for each sample, 7 to 9 ounces
- 1 pint glass and a coffee mug for each person
Supplies:
- Freshly roasted coffee samples preferably 4 to 12 hours from roasting, no more than 24 to 48 hours old, approximately 12 grams of coffee for 6.5oz of boiled water
- Paper towels or hand towels
- Cupping forms or paper & pencil to take notes
1. Setup the Cupping Session
Setup is the first step. Planning a cupping session is important. The area and the surroundings you cup coffee in needs to be free from distractions and strong smells that could influence your perception of the flavor and aroma of the coffee samples. The area you cup in needs to have enough room for everyone to move around the table freely. Setup your cups, trays and spoons in accordance with the number of coffee samples you have to cup. Put clean filtered water in the pint glasses to rinse your spoons as you cup. (See Figure 1.)
| Figure 1. The Cupping Table |
|---|
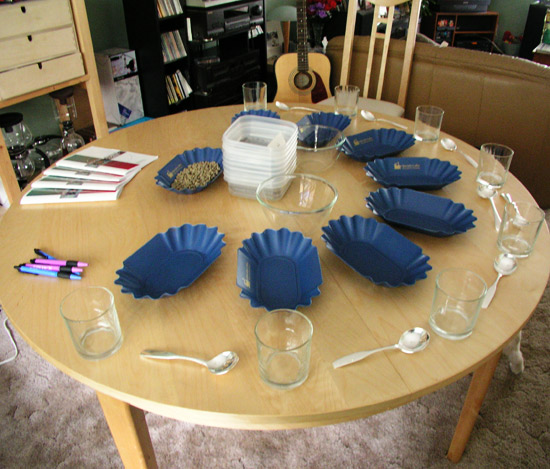 |
| Source: brewminate.com |
| Caution | |
|---|---|
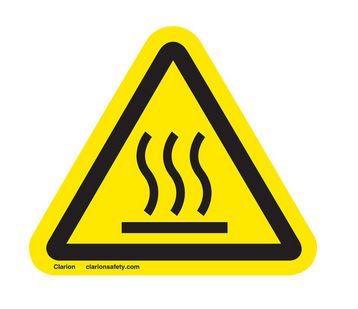 |
Burn Warning! Boiling water can severely injure. Use caution when handling a hot water kettle. |
| Caution |
2 Heat water
Prepare enough filtered water for all of the samples. Each sample cup will take approximately 6 ounces. Heat the water while preparing the coffee samples. When your cupping coffee at home using a simple hot water kettle is fine. (See Figure 2.)
| Figure 2. Hot Water |
|---|
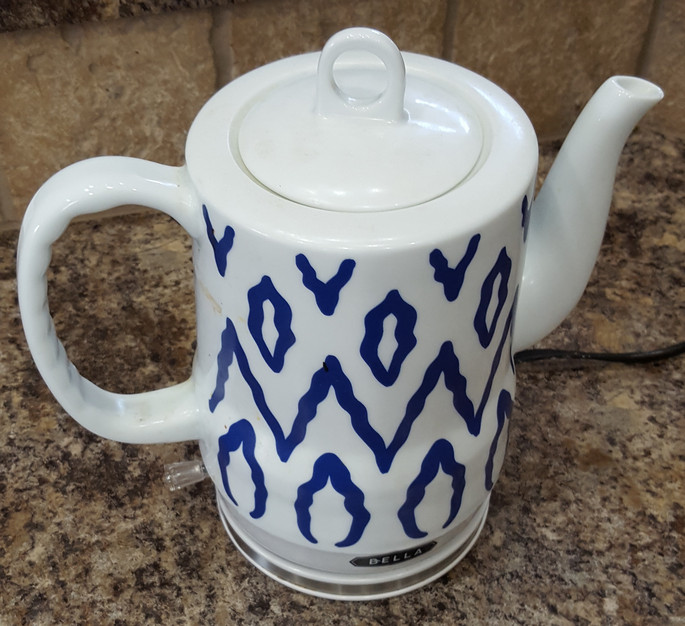 |
| Source: Author |
3. Grind the Coffee
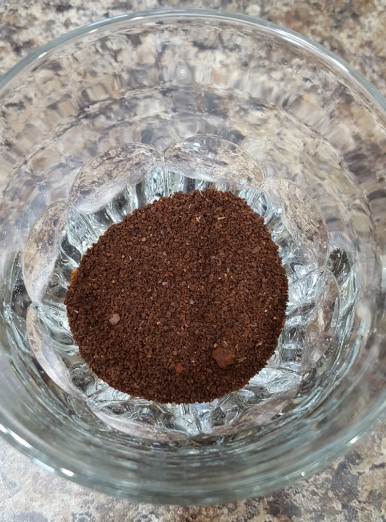
Use a medium coarse grind, slightly more coarse than drip grind. 12 grams of coffee for each 6.5oz of water. Clear the grinder before grinding samples each time you grind a different coffee sample. Clearing the grinder: grind about 2 to 3 grams of the coffee you are going to sample and discard it then grind your sample for cupping. You must do this each time you grind a sample for each cup, otherwise your samples will be contaminated with the previously ground coffee sample from the grinder. Out of the 12 grams from your roasted coffee sample you will be using about 9 or 10 grams for cupping discarding the several grams for clearing the grinder.
4. Measure out the coffee
Measure out the freshly ground coffee into the sample cups. 10 grams of coffee for each 6.5oz of water in each sample cup. Cupping is done in pairs, each coffee sample is duplicated so that you are cupping each coffee against itself as if they were different coffees. This comparison is done to catch variations within samples. The potential of having a bad bean in a coffee sample can be detected using this procedure. Once all of the ground coffee samples have been put in the cups, now is the time to focus. Attention needs to be on sampling the coffee. At this point all of the distractions need to be put away and everyone needs to focus on sampling. (See Figure 3.)
| Figure 3. Samples |
|---|
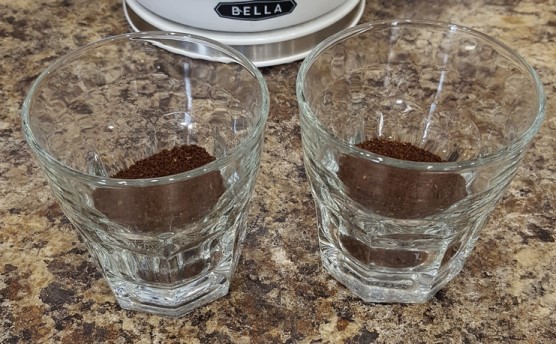 |
| Source: Author |
5. Dry Aroma
Cupping coffee begins before you take the first taste. Cupping coffee is a sensory experience starting with smelling and evaluating the dry aroma of the coffee grounds. Each person should smell the coffee with their nose right up to the rim of the cup, gently inhaling the aroma with your mouth open slightly, this helps you get a more full aroma to your palate. Make notes, try to describe what you are smelling. Then go to the next sample and evaluate it in the same way. (See Figure 4.)
| Figure 4. Dry Aroma |
|---|
 |
| Source: Author |
6. Hot Water
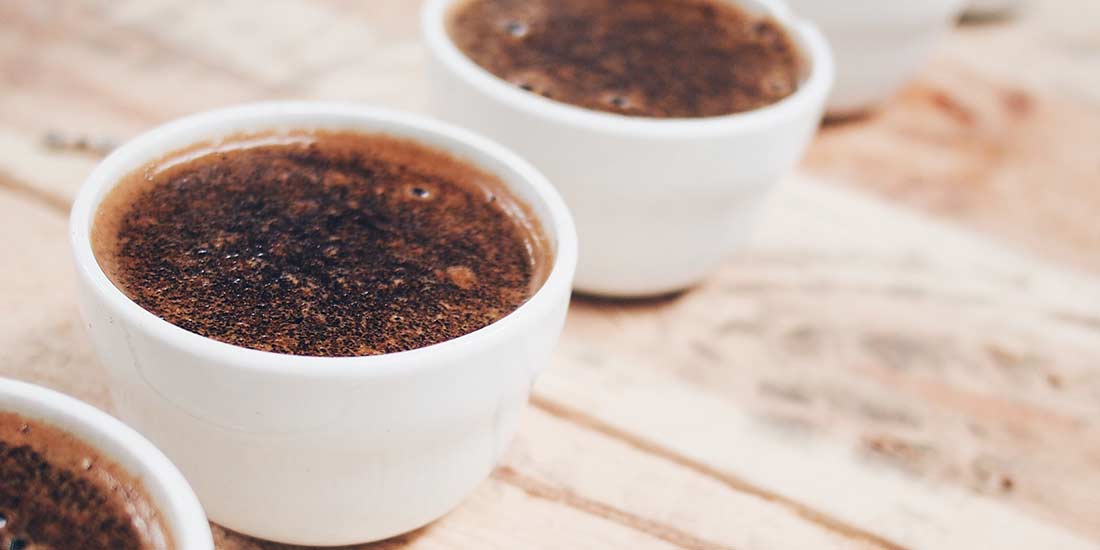
Once everyone is satisfied with sampling the dry aroma, now is the time for hot water. Make sure the water is boiling. Remove the water from the heat and pour 6 to 7 ounces into each sample cup. Pour gently but pour fast enough to stir and wet the grounds without using a spoon to stir them, make sure to pour the same amount of water in each cup. Do not disturb the samples once the water has been poured. Its important to not disturb the cups once the coffee grounds have mixed with the hot water, the coffee grounds must form a crust for successful cupping. (See Figure 5.)
When pouring water into the sample cups time is important. For this reason I think 8 ounce cups are best, when your moving fast to fill many sample cups if they are large and you have to judge to carefully to get the fill level correct you tend to over fill the cups.
| Figure 5. Wet Grounds |
|---|
 |
| Source: samplecoffee.com.au |
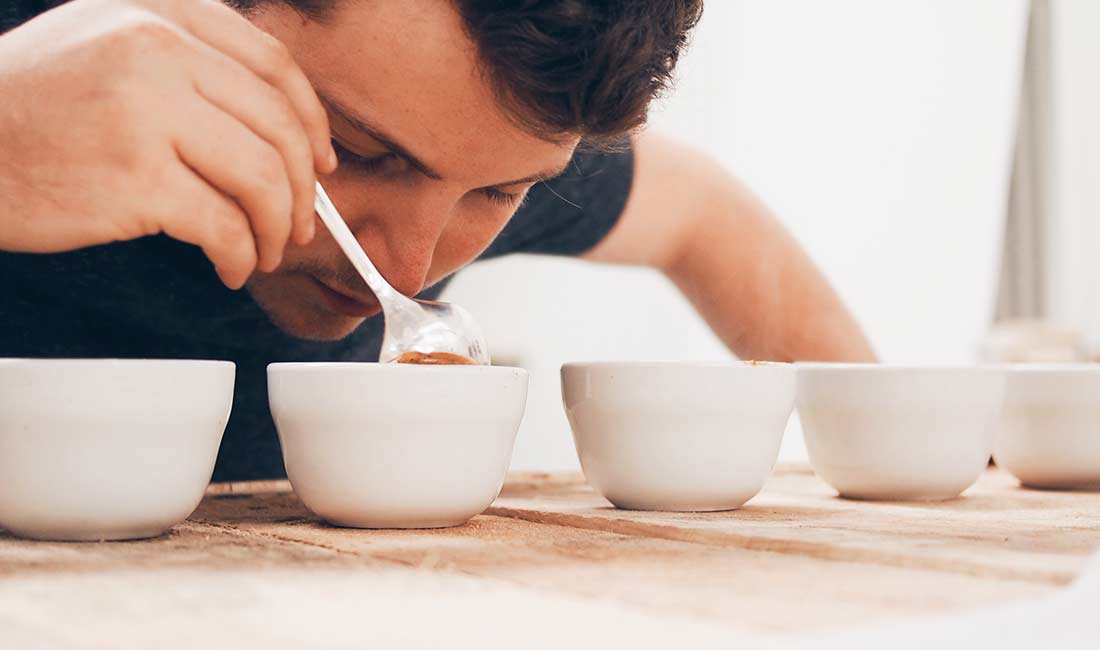
7. Breaking the Crust, Wet Aroma
Once all of the sample cups are filled there is a 4 minute steep time. Once the coffee has steeped 4 minutes you break the crust and evaluate the wet aroma just as you did with the dry aroma. Use the back of your spoon to break the crust that has formed on the top of the now brewed coffee. Stick your nose in it! Not literally but almost. Put your nose as close as you can without getting coffee on it. Inhale the aromas as your spoon breaks through the top layer of grounds. Gently push the coffee grounds down into the cup and away from your nose to expose the liquid coffee underneath smelling the aroma while you do this. Make notes or fill out the cupping form for each coffee. (See Figure 6. & 7.)
| Figure 6. Breaking the Crust |
|---|
 |
| Source: samplecoffee.com.au |
| Figure 7. Wet Aroma |
|---|
 |
| Source: scaa.com |
8. Remove the Remaining Crust
Remove the coffee grounds that are still floating on the surface in a circular motion with your spoon. Be careful not to disturb the coffee grounds on the bottom of the sample cup. Use one of the coffee mugs to dispose of the grounds removed from the surface. Do not remove to much liquid in this step. Rinse your spoon in between each sample cup in the pint glass. (See Figure 8.)
| Figure 8. Cleaning up the cup |
|---|
 |
| Source: samplecoffee.com.au |
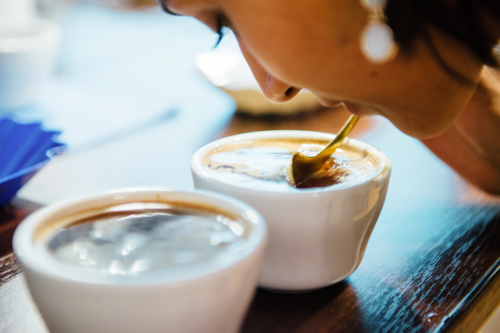
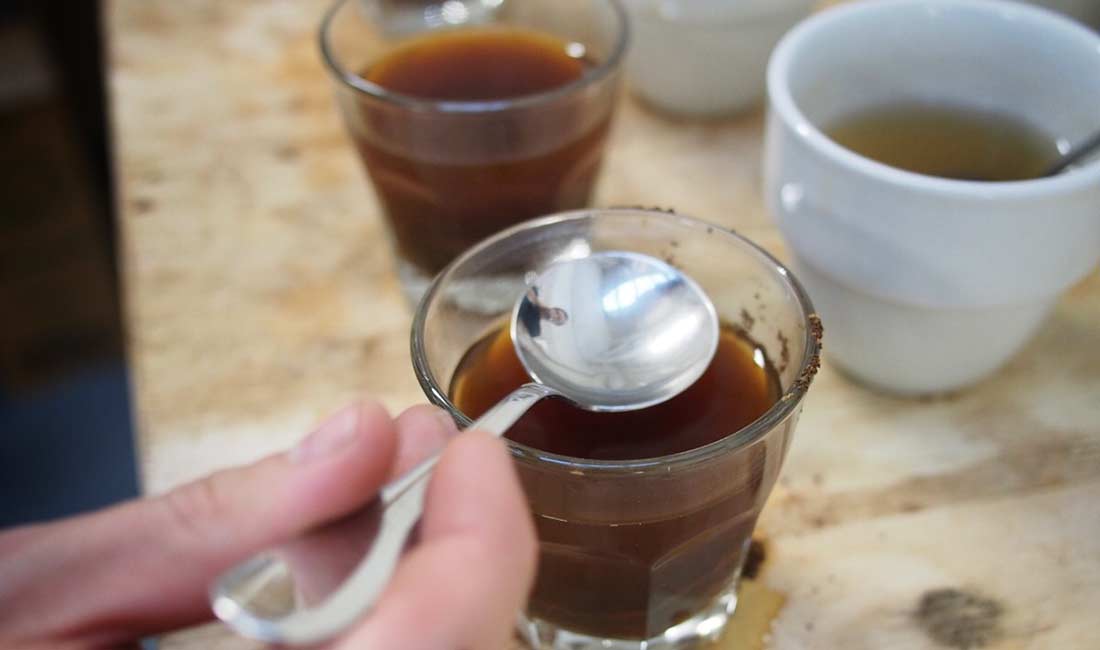
9. Taste the Coffees
At this point the coffee will still be warm. You can start to taste the coffees now. Make notes of the flavors you can perceive you will want to compare them to the flavor as it cools. You can taste more flavors as the coffee cools but I often find the flavor changes as the coffee cools. Some flavors are present in the warm coffee that fade as the coffee cools. Make notes.
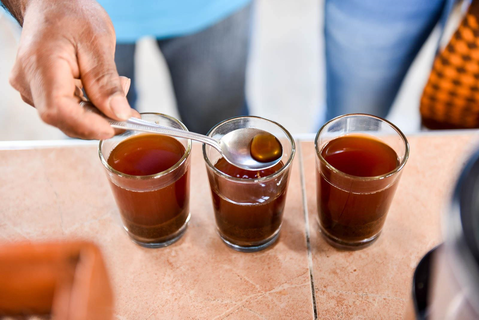
I slurp therefor I am. Your mother told you never to slurp your food, but when you cup coffee you draw in air as you take in a sharp breath slurping the liquid coffee with it. You spray the coffee onto the back of your palate improving the ability to taste the flavors, what this means is you slurp loudly. Be careful not to choke on the coffee as you slurp. Make notes. You can spit coffee into the coffee mug, you will find that you will consume far too much caffeine when cupping many samples throughout the day(See Figure 12, p. 6), or when you cup later in the day.
Rinse your spoon in the clean water in the pint glass as you go from coffee sample to coffee sample.
| Figure 9. Tasting the Coffee |
|---|
 |
| Source: Neil Palmer |
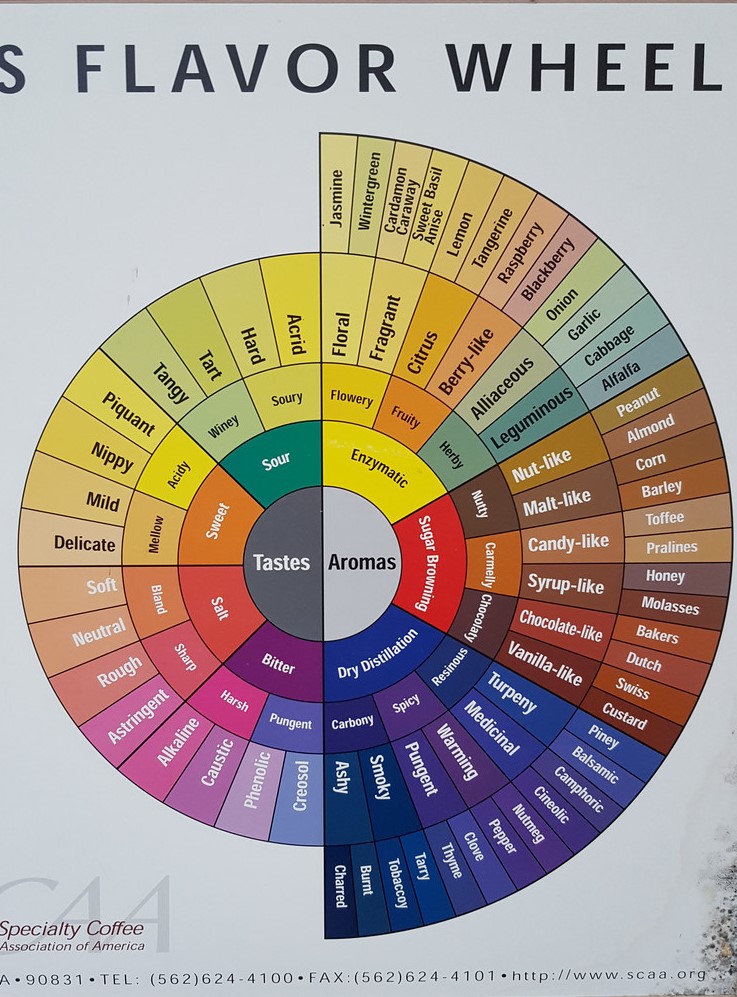
10. Score and Discuss What You Have Tasted
Coffee cupping tends to be a social event even when it’s work. Discussing the characteristics of each coffee and describing what you have tasted helps you gain skills. Coffee cupping is not easy, tasting coffee and describing the nuances of flavors takes time and a lot of sensory skills to be good at it. The Specialty Coffee Association of America has a Coffee Flavor Wheel that can help you to describe what you are tasting (See Figure 10.)
| More information about coffee cupping. |
|---|
| The how to from the Specialty Coffee Association of America SCAA Cupping Protocols PDF |
| Coffee Cupping Protocols Coffee Cupping Protocols |
| Coffee Cupping Standards Coffee Cupping Standards |
| One of many coffee cupping forms, this one may be to complex for most peoples needs. Coffee Cupping Form PDF |
| Another coffee cupping form, this form is easier to use. Coffee Cupping Form PDF |
| Figure 10. The SCAA Coffee Flavor Wheel |
|---|
 |
| Source: Author |
| Figure 11. The Coffee Bean Thief |
|---|
 |
| Source: Author |
| Figure 12. The Coffee Cupping Table |
|---|
 |
| Source: NarCoffee Roasters |
/content/post/CloudIron